Waspaloy Project
People often ask how thick we can cut with our waterjet, and it’s hard to know how to answer them, because the truth is that the slower you run your machine, the thicker you can cut. So, if you can figure out a way to get the material under your cutting head, you can cut through pretty much anything.
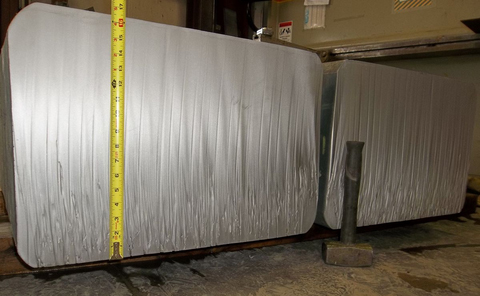
One of the thickest cutting jobs we’ve done was 16-½” thick Waspaloy, which is superalloy used in extremely high temperature applications like jet turbine blades. The material was in the form of a 10,000 pound billet, and all we were required to do was make three cuts across the width, severing it into four pieces.
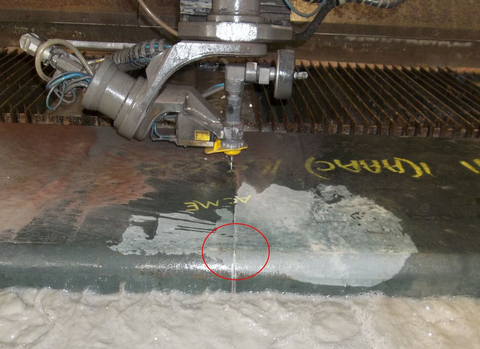
Image 1 shows the waterjet in action. The red oval directs your attention to the way the kerf has completely closed up behind the stream due to residual stress within the material being relieved. Our customer had originally tried making the cuts with a bandsaw, but was unsuccessful because the saw blade got pinched so tightly that they ended up having to cut the blade and leave the captured piece stuck in the material.
The greatest challenge we faced on this project is something that can be seen in Image 2. You can see linear marks every inch or so that start all the way at the top of the cut and extend to the bottom. We were quite perplexed because this is not normal behavior at all. The marks were obviously created by some kind of disturbance during the cut, but we were unable to determine the cause. We concluded that it could have been created by (1) a momentary interruption of the abrasive flow; (2) some type of inconsistency in the surface of the material, like a crack or a really hard chunk of metal, which could have deflected the stream; or (3) shifting of the workpiece.
The first option is very unlikely, because no abrasive problems were noticed before or after this job; also, abrasive problems generally aren’t sporadic. The second option is the one we have favored, although we weren’t able to see anything on the surface that would have deflected the stream. The third option didn’t immediately present itself to us for the simple reason that you wouldn’t really expect a 5 ton chunk of metal to move when it’s sitting securely on it’s base. However, it’s obvious from what can be seen in Image 1 that the billet was deforming as the stress was being relieved, so it might be possible that the movement was happening in tiny jerks rather than as a slow creep like you would sooner expect. So, while this option doesn’t seem very probable either, it does remain a possibility.
The reason these little marks were such a big deal is because they resulted in the billet not being completely separated at the bottom. Without being able to determine the source of the problem and fix it, we were left with the option of cutting a lot slower, which would have been very costly, or making each cut twice. We opted to make all the cuts once and then flip the entire billet upside down and cut through from the opposite side — at a much higher rate of speed this time — to finish severing the connected areas.
So we got through it and it was a good job in spite of the unforeseen challenges. And we learned some things! That’s worth something too. Sometimes you make a good profit and sometimes you don’t, but you can always learn something, and after all, learning is a type of profit.